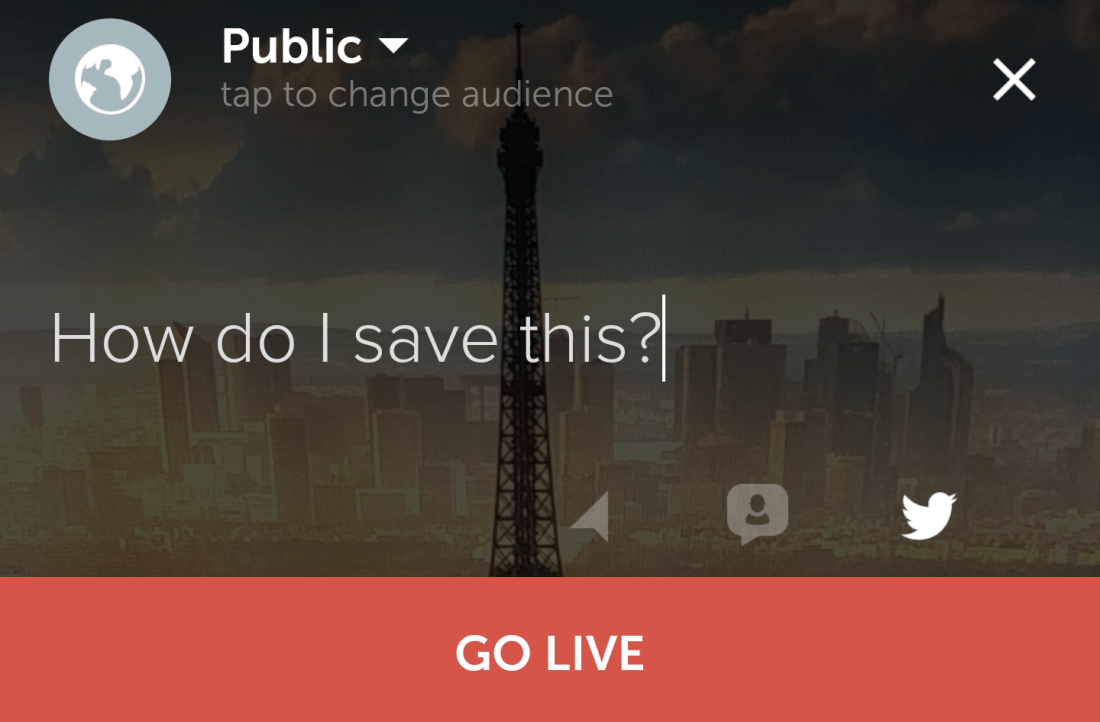
A question frequently asked by Periscope users is “can I save Periscope videos?” Sometimes they mean saving their own broadcasts, and sometimes they mean saving someone else’s. There are many ways to achieve this, some supported by Periscope, and some not. Below is an overview of the various ways that Periscope broadcasts can be saved, either online, or locally to your device.
The Periscope way
Periscope offers many ways to preserve your broadcasts. You can keep them online, where others can continue to view them, or you can remove them from online but save them locally to your device, in case you want to watch them back later. Outlined below are the various ways that Periscope allows you to save your own broadcasts.
1) Keep it online (disable Auto-Delete)
The original version of Periscope would only keep your broadcasts around for 24hrs. Afterwards, they would get deleted automatically. Periscope now offers the option to configure whether you want your broadcasts to be deleted after 24 hours or not. If you want your broadcasts to remain online so that others can continue to view them through Periscope or Twitter, then simply go into the apps Settings and ensure that Auto-Delete after 24hr is disabled.

2) Save it online (#save)
If you prefer to keep Auto-Delete enabled, but want to prevent a specific broadcast from being automatically deleted in 24 hours, then another option is to add #save to the title of that broadcast. This will keep it around online indefinitely, or at least until you decide to delete it manually.

3) Save it to your device
Occasionally you may want to save a broadcast without keeping it online. In this case, Periscope provides an option to save the broadcast locally to your device. Once you’ve ended your broadcast, select the option to Save to Gallery (or Camera Roll for iOS), and the broadcast stream will be saved onto your device in mp4 format.

4) Enable Auto-Save feature
Periscope also offers an option to automatically save your broadcasts. In Settings you can enable Autosave Broadcast. This will automatically save your broadcasts locally to your Gallery (or Camera Roll for iOS) once they complete. The broadcasts will also be kept online until either you decide to delete them or they expire.

The Snagscope way
If you forgot to save your broadcast when it ended and didn’t have auto-save enabled, you would be out of luck. Periscope does not provide the means to download/save your broadcasts after the fact. Fortunately, there’s Snagscope.
Snagscope is an Android application that lets you save any public Periscope broadcast, whether it’s your own, or someone else’s. It can save Periscope broadcasts after they’ve completed (replay), or as they are going on (live). The only exception is that it does not save private broadcasts.
Below are various ways that you can use Snagscope to save Periscope broadcasts locally to your device.
1) Copy/paste share link
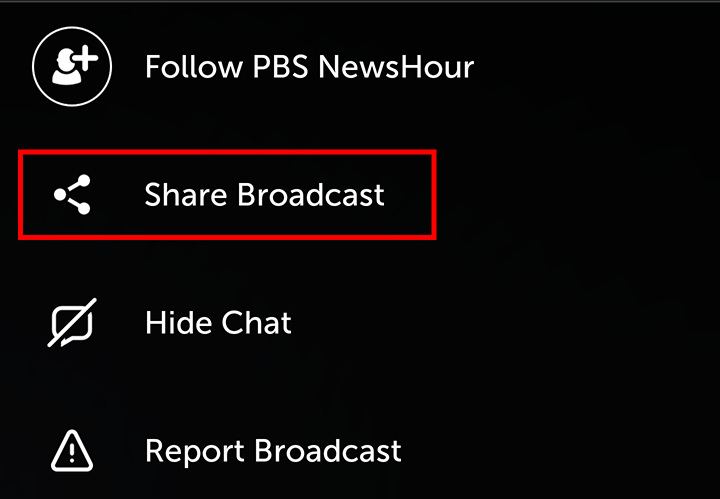
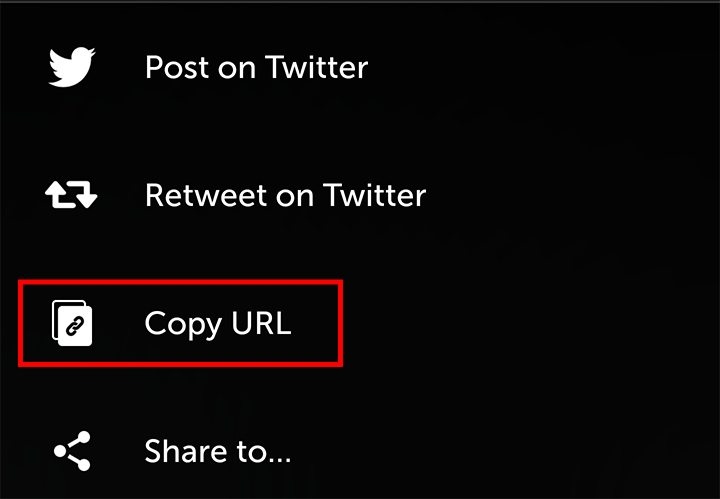
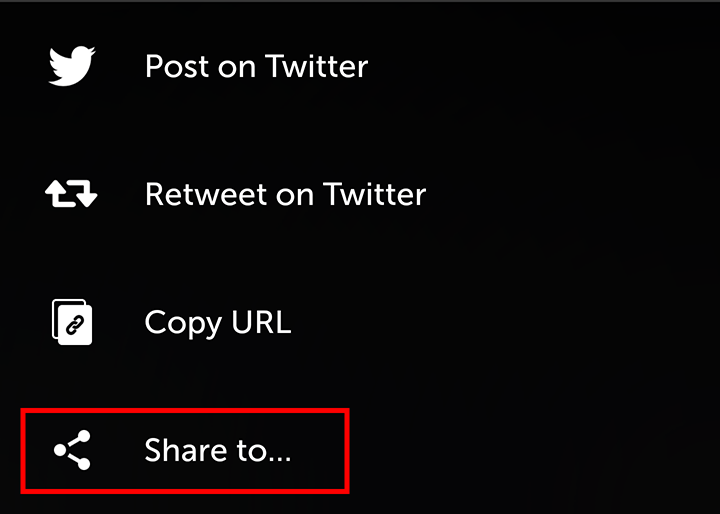
If you are viewing a broadcast in Periscope that you would like to save, click on “…” in the lower right corner to bring up the menu. Then select “Share Broadcast”, followed by “Copy URL”.
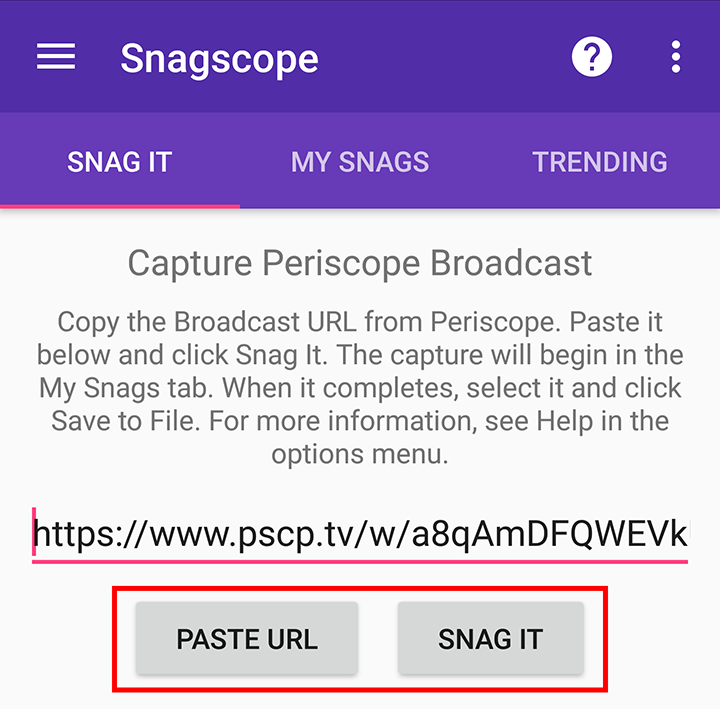
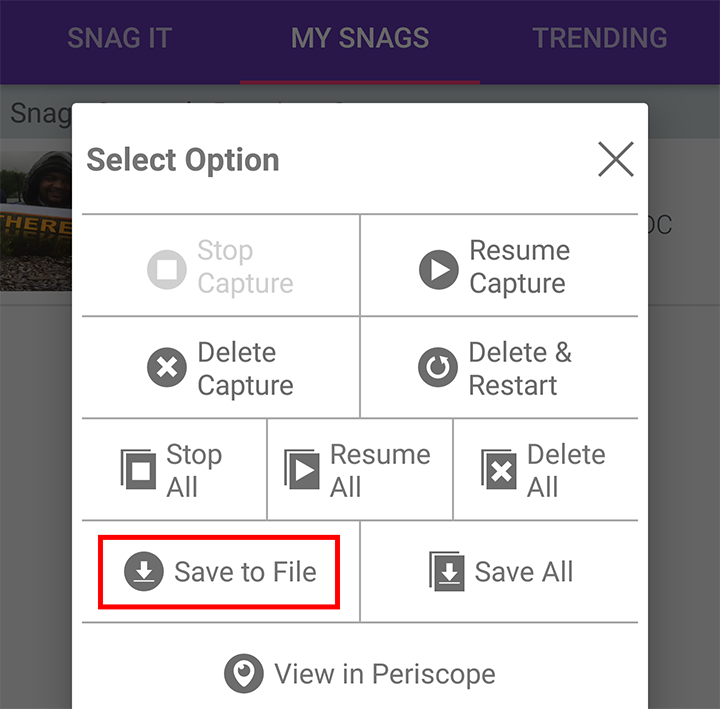
Once you’ve copied the Periscope URL, switch to Snagscope and click on “Paste URL” followed by “Snag It”. This will begin capturing the broadcast. When it completes, click on the entry in the “My Snags” tab to bring up the option menu and select “Save to File”. This will save the file to your Downloads folder as an mp4 video file.
2) Share to Snagscope
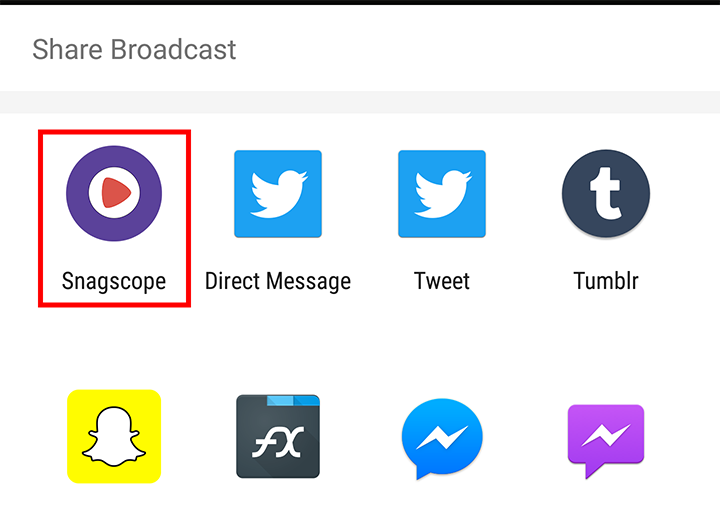
Another option is to share directly to Snagscope. After clicking on “Share Broadcast”, rather than selecting “Copy URL”, click on “Share to…” instead and select Snagscope. This will start capturing the broadcast in Snagscope and allow you to resume viewing it in Periscope.
3) Clipboard monitoring
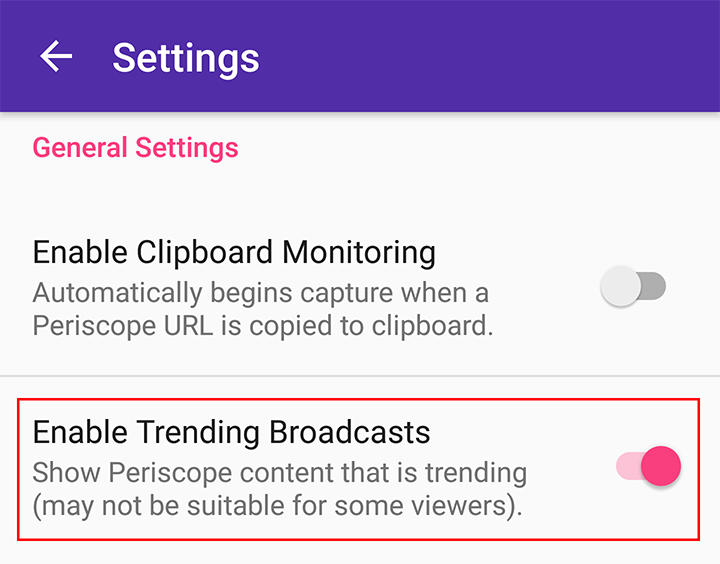
Snagscope also supports clipboard monitoring, which will initiate a capture the moment it detects a valid Periscope URL in the clipboard. This way, simply clicking on “Copy URL” is enough to begin the capture, so you can resume viewing the broadcast. You can enable this feature in Settings.

4) Quick-snag
Yet another feature of Snagscope is its ability to view what is currently trending on Periscope. You can enable this feature in Settings. Once enabled, you can quickly start a capture directly from the Trending tab by pressing and holding down on a broadcast that you would like to capture.

Snagscope was created with the intent of helping users by providing functionality that is currently not offered by Periscope, but it can also be misused. Please respect Periscope policy as well as content authors rights, and do not share captured videos without the authors consent.
If you find Snagscope useful, please help us by rating it and/or sending us feedback. For any feature suggestions or if you wish to report a defect, use the options available in the slide-out menu.

Wait, what about iOS/iPhone?
Unfortunately Snagscope is not available for iOS, and probably will not be anytime in the near future because Apple has a tendency to remove video capture apps from its store. Although we can’t support them, below are a few alternatives for saving Periscope videos if you are on iOS.
1) Periscope download sites
Similar to how Snagscope copy/paste works, there are a few online websites that will allow you to paste a Periscope URL into them and produce a video file. The video files are created in MPEG-TS (.ts) format, but they can be easily converted. To use them, open a browser and navigate to one of the following URLs.
http://downloadperiscopevideos.com/
http://periscopevideodownloader.com/
https://getvideo.at/en/faq/how-to-download-periscope-video
Update: Due to some trademark litigation in Turkey, Periscope changed it’s URLs from periscope.tv to pscp.tv, which in turn caused these sites to break. If you encounter errors when using these sites, try changing the URL back to periscope.tv and that should work.
2) Using FFmpeg
If you are somewhat technically savvy and have access to a Mac, then another option is to use FFmpeg. Below are some Python scripts that accept Periscope URLs and save the stream to either .ts format or convert it to .mp4 format. In order to run them you will need Python3, and you will need to download and install FFmpeg for OS X. These scripts work with live Periscope broadcasts as well.
https://github.com/rharkanson/pyriscope
https://github.com/peterfdej/record_peri
3) Use an Android emulator
For users with access to a desktop or laptop computer, yet another option is to use an Android emulator to run Snagscope. How to do this is detailed in our post, How to run Snagscope on a Mac or Windows computer. This is also a useful option for users who would like to record their broadcast, as well as others, while they are broadcasting.
What if I want to save the interactions?
All of the techniques described above will capture the Periscope video, but not the interactions (hearts and comments). For those users that wish to capture the interactions as well, your best bet is to use screen capture software. For Android we recommend AZ Screen Recorder or DU Recorder. For Mac OS you can use ScreenFlow or Quicktime.
